I’ll be honest – I’ve started several updates over the last month but get too frustrated to finish any of them LOL
It has been approximately 90000028 years since we started this kitchen renovation. Okay, okay, I know it’s only actually been 6 weeks since we brought the first cabinet upstairs. The truth is, doing DIY yourselves on the weekends and evenings takes TIME. SO. MUCH. TIME. And we’ve never done a kitchen renovation before, so we’re taking a lot of time to google things, re-do things, go to Home Depot for more supplies, and really just learn. As someone who is Type A and loves to learn new things (as in acquiring the knowledge) but not the process of learning (aka making mistakes), this has been killing me. I’ve wanted to throw in the towel a few time this week and just put it all back downstairs and try again next year. I don’t mean to be a buzz kill, but sometimes only seeing the fun and easy part of DIY you forget it is messy and time consuming, and at times SO frustrating.
The part that is causing me much of my frustration is the constant re-doing of things. I had a blog post all about us screwing the cabinets into the bases and the wall that I started about 4 weeks ago… and since then we’ve redone it several times. As I type this, my kitchen is currently torn apart again but that is the renovation and DIY life.
Why have we had to take it apart so many times, and how can you learn from my mistakes?
First, we have to run through the phases of what we’ve done
1 – Base 2X4 and a 5/8 plywood “spacer” to lift the cabinet
- We first did this thinking we needed more room for the dishwasher.
- Took it apart when we realized we would have to cut the window trim, and it looked like just a 2X4 would be enough height
2 – Base 2X4 with no spacer
- This wasn’t too bad, we just had to take the cabinets off and unscrew the spacers, then replace the cabinets. About 30 min of work including emptying the drawers.
- It lived like this until we got counters
3 – Base 2X4 with no spacer but closer together
- Once we got the counter, we realized that the cabinets stuck out about 1/16th from under the counter. Due to budget limitations, we could only do an 8foot piece and didn’t want to splice 2 pieces just to have a bit of an edge.
- Took off the left side, realized that if we move it that the baseboard gap would be too big, and put it back together.
- Took off the right side, nudged it over ever so slightly, and put it back together.
- I really thought this was the end of it and they were in their permanent home at this point (lol)
4 – This brings us to now. Base 2X4 with 1/2inch spacer
- As it turns out, there wasn’t enough clearance for the entire dishwasher drawer so it was actually damaging the wood. Need more space.
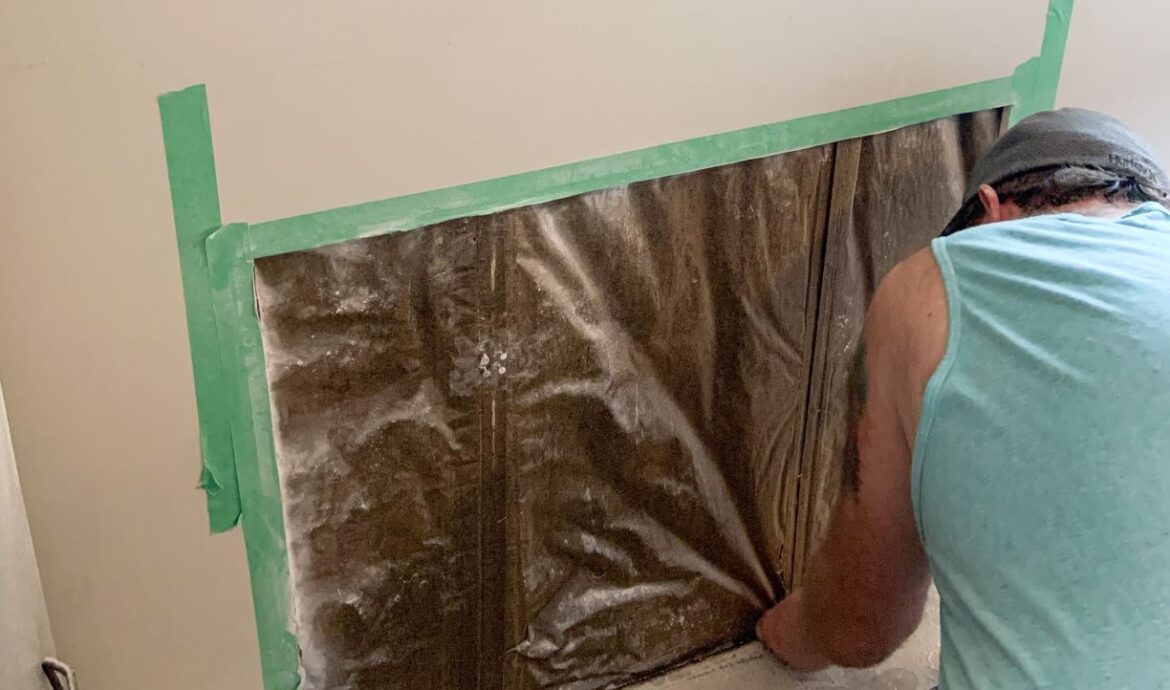
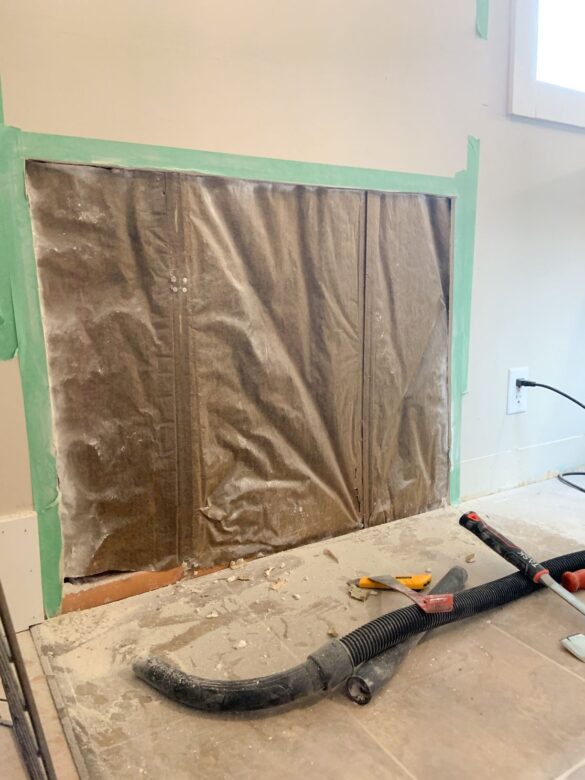
- Also, our current BC building code requires there to be an electrical outlet accessible for every span of countertop. As there were no countertops on this wall before, the one plug in on it will be used for the dishwasher. So we need to add electrical, and it has to be on it’s own circuit at the panel. This means cutting a hole in the wall for access and drilling to the basement to run the wires. This was probably one of the messiest parts so far. Cutting through 60 year old drywall is not fun.
- NOTE: Don’t be like me. We learned after that while the drywall was safe, the drywall mud 100% would have contained asbestos for the time it was made. We did not do this properly AT ALL so please don’t be like me. I don’t know that the proper way is, but this is once of those things where I know just having the dust free roam around my house was not the right way.
So what have we accomplished in the last 6 weeks?
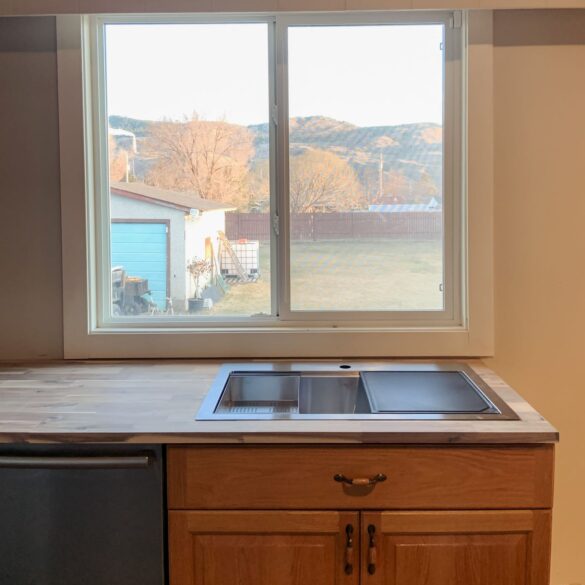
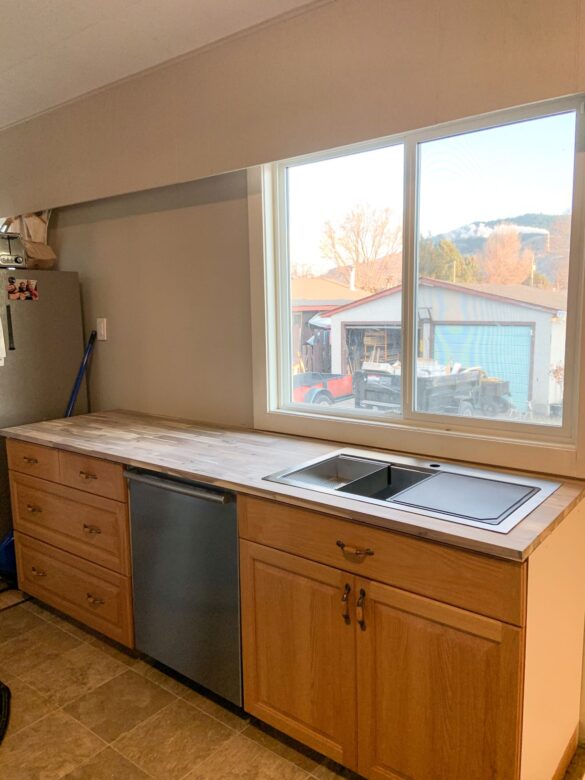
- Oiled the longest span of countertop
- Cut the hole for the sink and dry-fitted it
- Cut a hole for the electrical access
- Moved the cabinets many times
- Cleaned the kitchen a lot
- Lovingly stared at the dishwasher as I’m doing dishes by hand and thought “soon, my precious, soon”
- Today Joe will be cutting the holes along the floor joists to the panel for the electrical
THE GOOD NEWS:
Once we have the electrical ran (crossing my fingers that’s in the next day or two!), we can attach the countertop on. Once that’s done, the plumber is ready to come and do his magic. Because we’re trying to work with the plumber’s schedule (this is a side job for him between his bigger jobs), the electrical might not be 100% functional, but we just need it to the point where we can block the hole permanently before we attach the countertop. This means I MIGHT have a dishwasher by Easter.
Which honestly, that would be the best Easter present ever.
To see our plans for the kitchen, catchup here!


Truett
Hello there. Good share for everyone. Anyway, we’re searching on how to start our renovation and kitchen remodeling. Thanks that I have found this post with a direct point and insights for our remodeling budget! My partner and I created a plan a budget that is the best fit for us. Wish me luck! https://www.houseandhold.com/collections/four-hands
Reed Johnson of Jackson Tile Installation
The wonderful results will surely make the struggles, challenges, and inconveniences worth it all.
Reed
Owner of https://www.jacksontileinstallation.com/