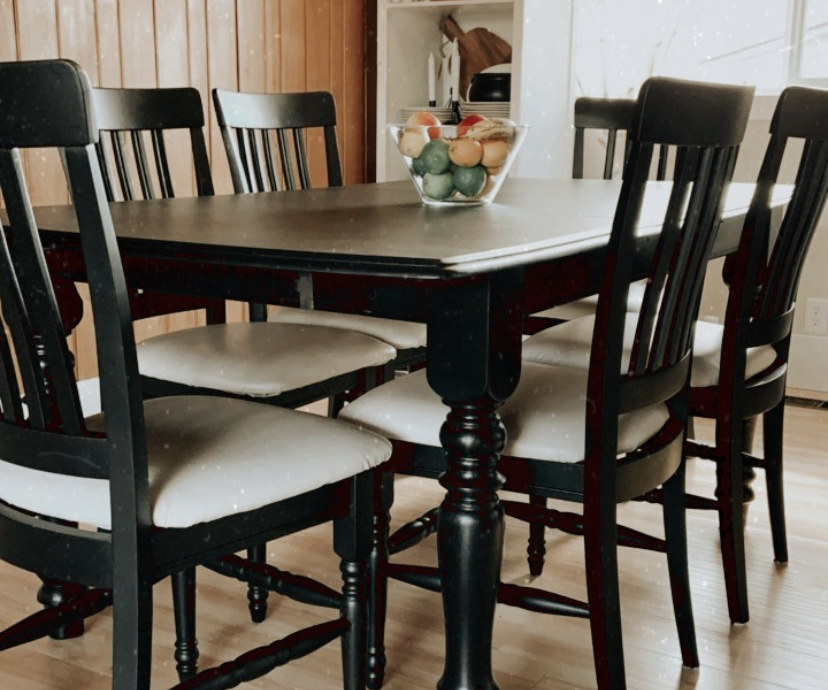
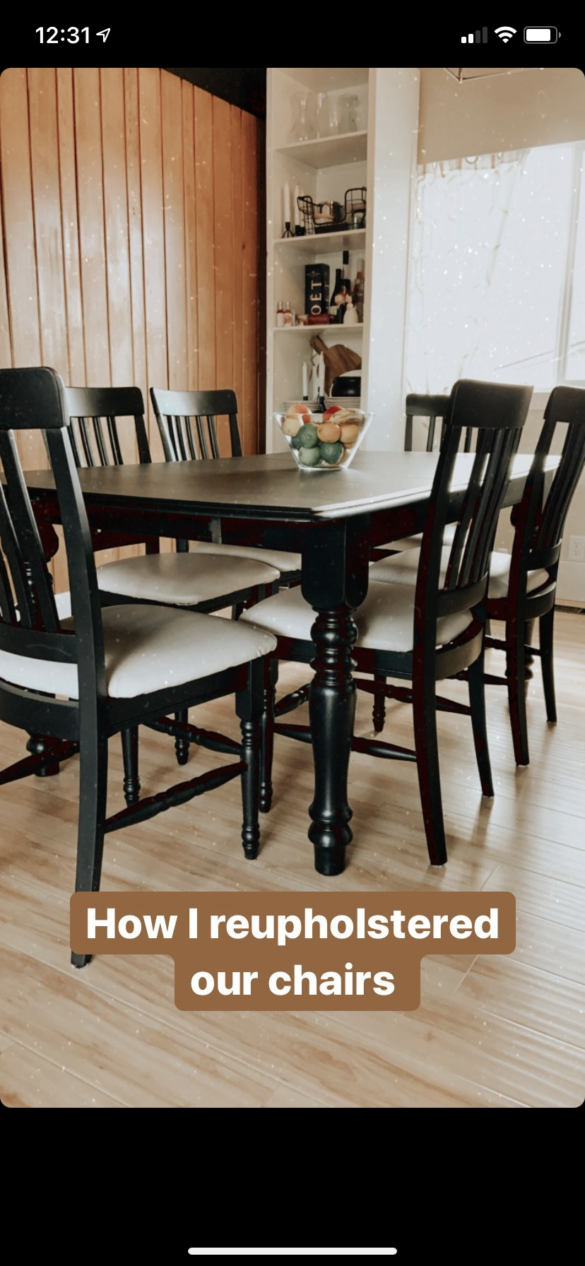
It’s been a ~few~ years since we had a dining set as living in 400square feet didn’t really allow for that to fit into our space. If you know me though, you know that I a) am indecisive AF and b) tend to lean on the more “expensive” side of taste. Joe was pretty fed up with both so when a coworker was moving and offered to sell us her table, the price was right and I knew would lend to some new DIY skills. I have painted furniture before! But I’ve never tackled reupholstering dining chairs before.
Originally a pattern that just wasn’t my style, I wanted to change it to something more neutral and easy to clean. Which meant my desire for velvet was off the table pretttttty darn fast. We took a trip to the local fabric store and I found this faux-leather in a neutral oatmeal/taupe colour. It was a bit harder to work with, but gave me the look I wanted! These are the steps I took to reupholster the chairs. I’m by NO means an expert and most of this was trial-and-error and youtube! But if I can do it, so can you!
note: I did not remove the old fabric in this case. I did try but it was a huge pain, so I just covered overtop.
You will need:
- Fabric (the amount will depend on the size of cushions/how many you need.
- Fabric scissors
- Garbage bag or cardboard
- Felt pen for tracing
- Staple gun and upholstery staples
- Staple remover (not for paper, but the more intense ones for industrial staples)
- Hammer
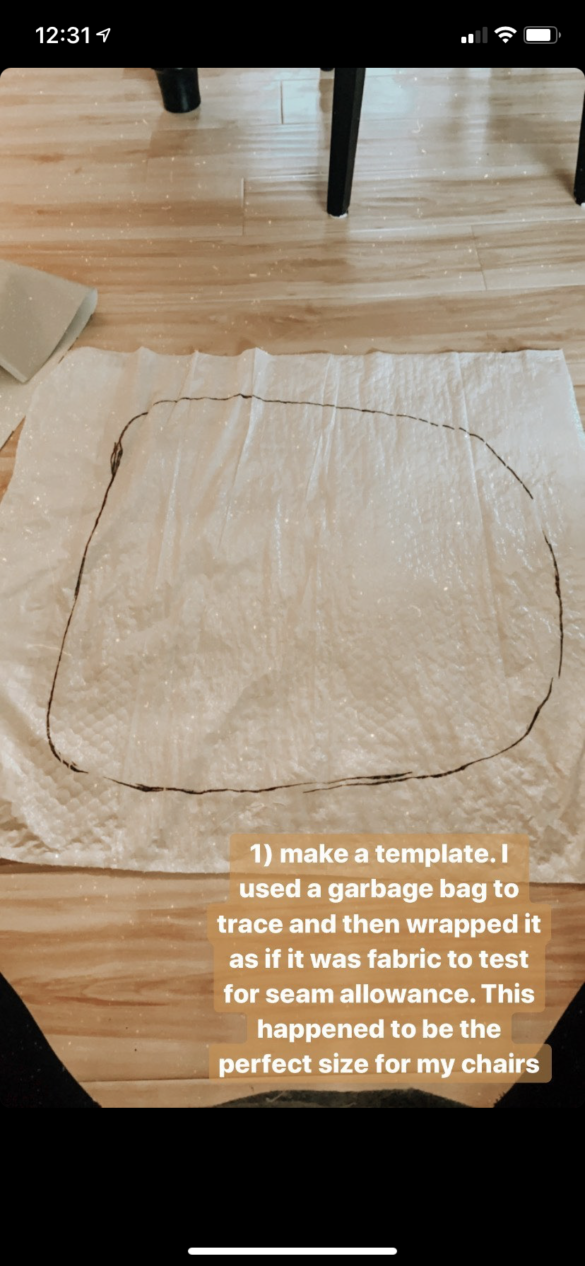


1 – Make a template. After taking the cushion off (there were screws in the bottom), I traced the outline of the seat onto a garbage bag. I did not cut this out as there was about 2 inches around the outline to the edge of the bag as a “seam allowance.” Cardboard would have likely worked a bit better for durability, but this is what I had on hand. The unexpected pro of using the garbage bag though, was that I could then fold the bag around the chairs as if it was fabric and make sure if I cut the size of the bag that it would be enough fabric.
2 – Cut out your fabric. I cut mine to match the size of the garbage bag and then I steamed it but an iron would work well too.
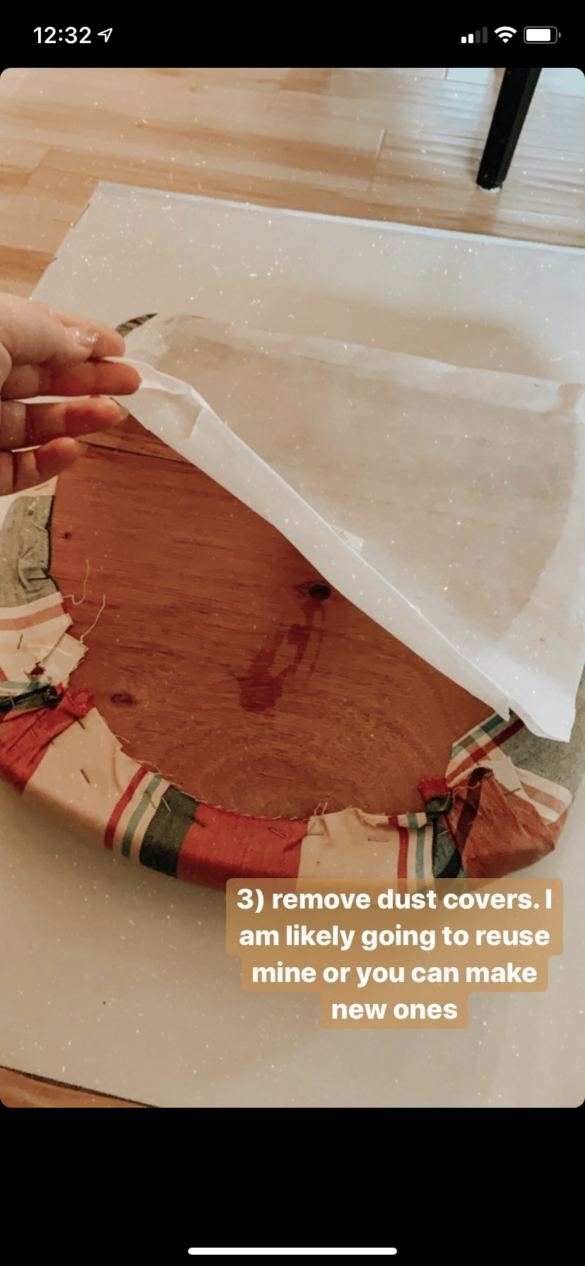
3 – Remove the dust covers from the seat. On the bottom of your seat cushion you will have either a band, or it might cover the entire base, of a thinner material. This covers the unfinished edges of the actual material, keeping it flatter, and also makes it look neater.
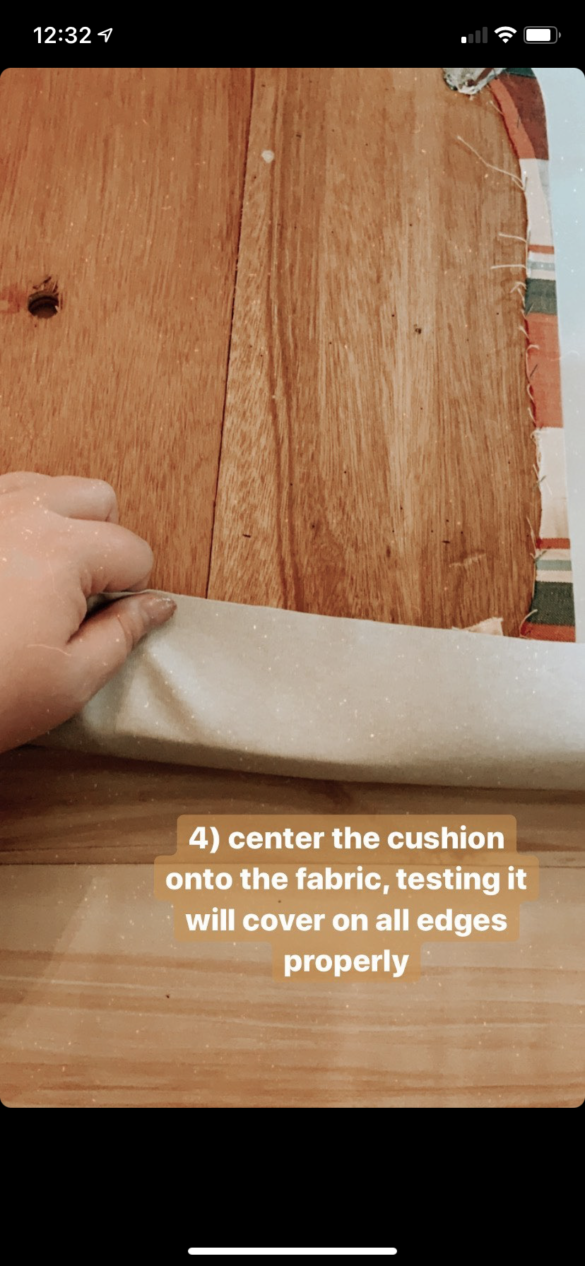
4 – Test fit. Center the cushion onto the fabric and test that it will cover on all edges properly.
5 – Tack in place. Smooth the fabric, and put a stable in the center. I personally found the easiest way to start was on the flattest edge. This might need to be moved when you do the other sides, so don’t fret if it isn’t in very deep!
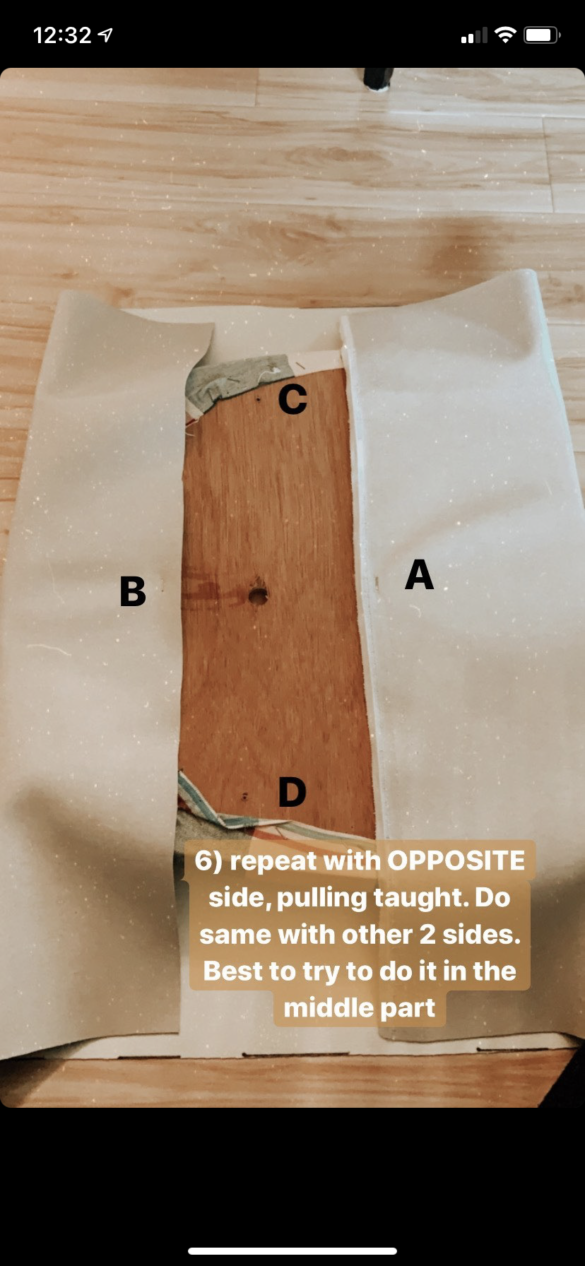
6 – Repeat step 5 on opposing side. Put one staple in the center of the length until all 4 sides are tacked down.
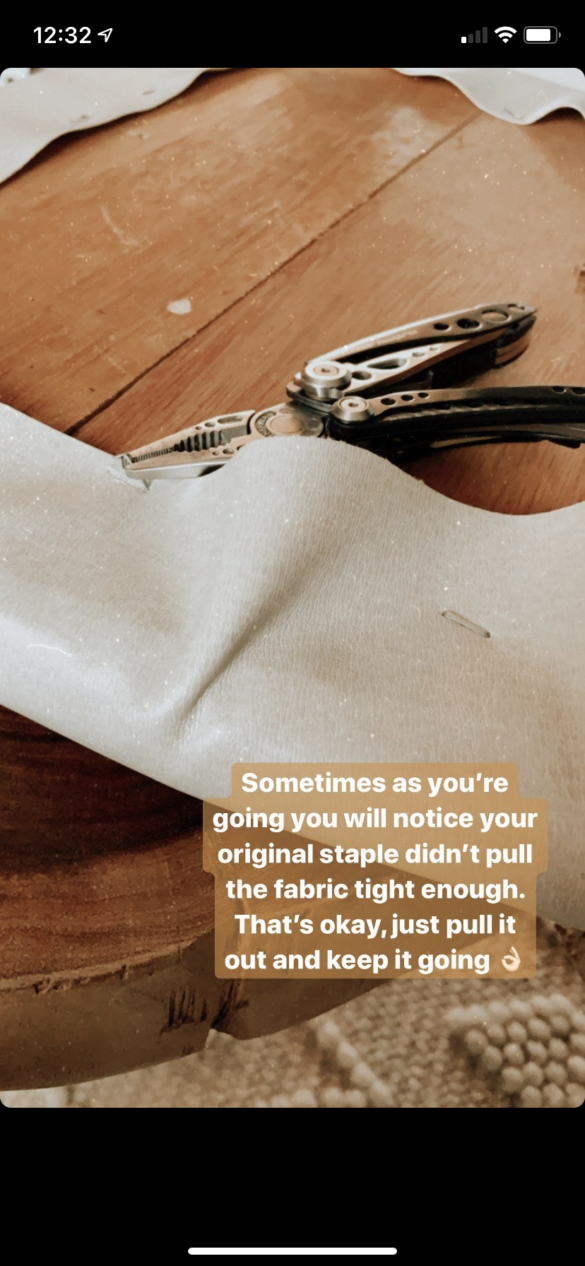
7 – Staple a length down. Start by working outwards from the center and leave some space at the corner. You might notice through this step that your original staple wasn’t pulled tight enough. Just take it out and keep going!
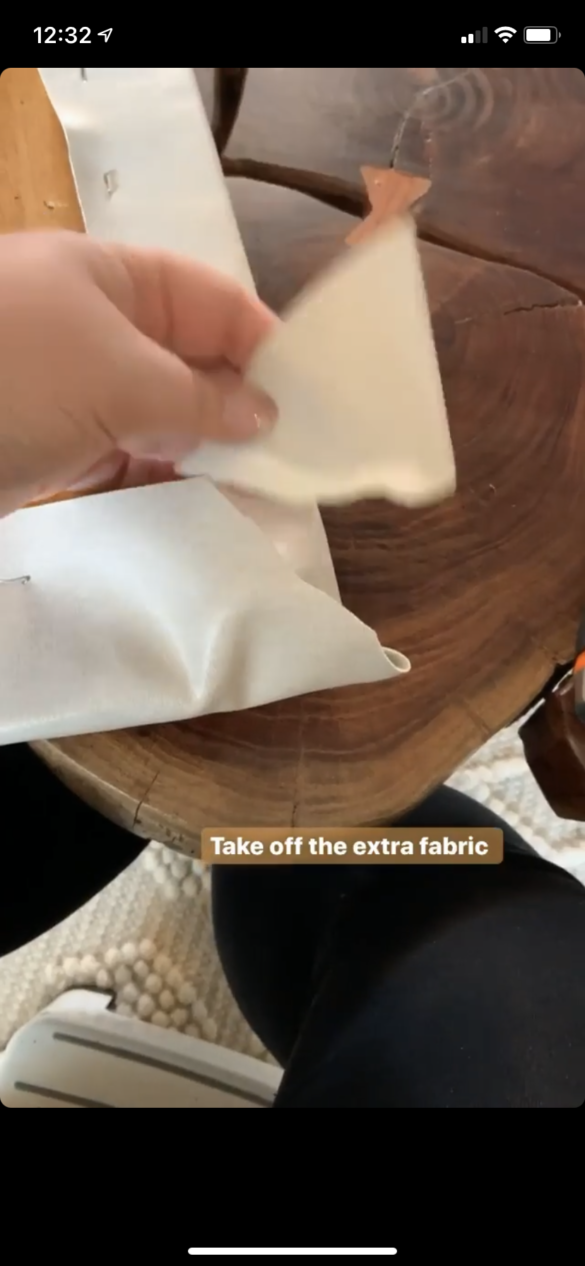
8 – Remove extra fabric at the corners. I found pinching it and cutting on a diagonal worked best.
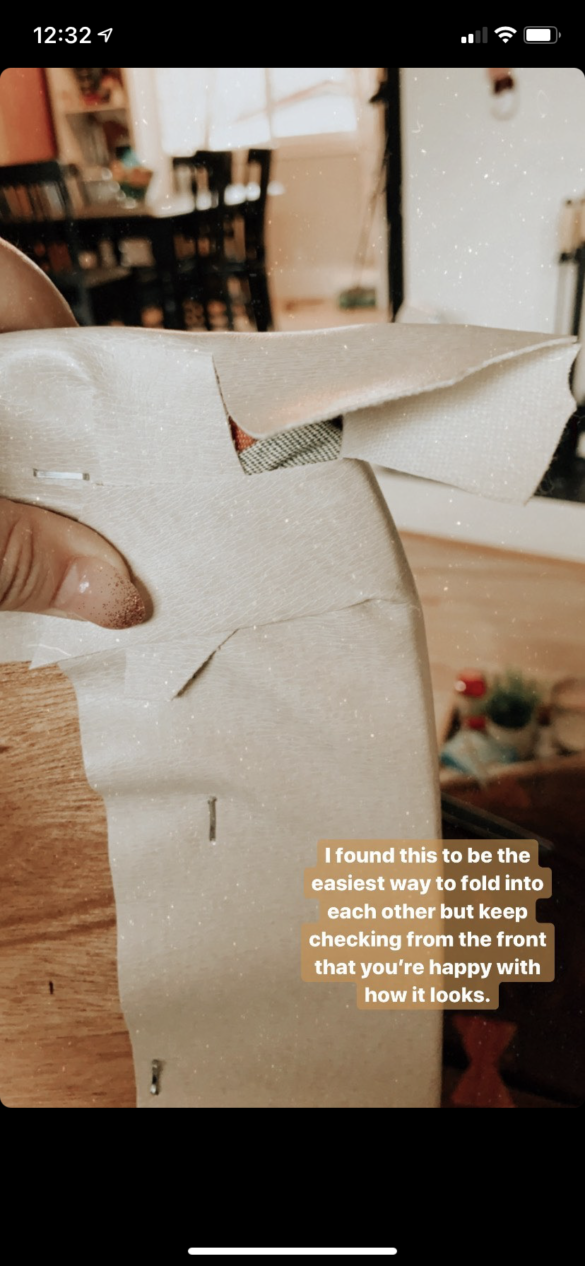
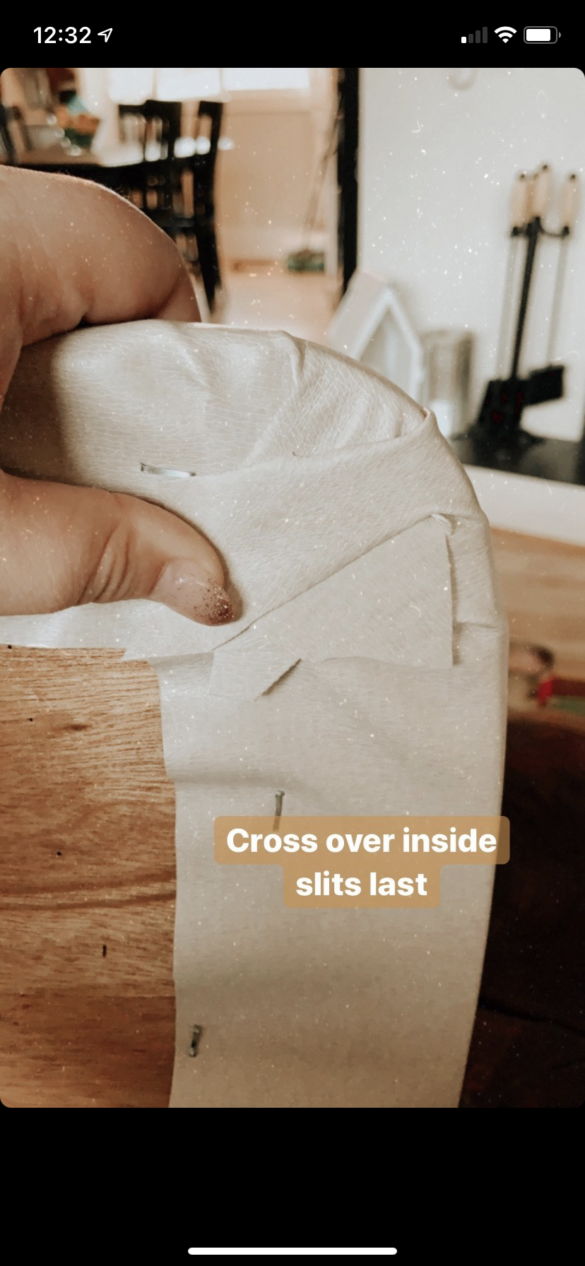
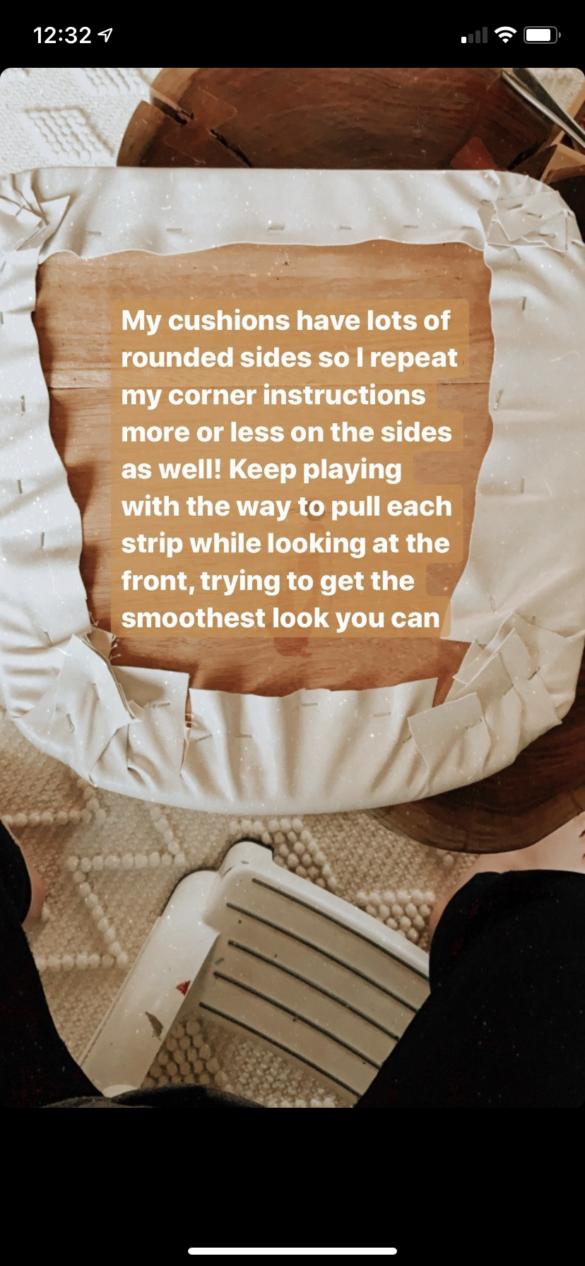
9 – Corners. Because my corners were very curved and my fabric did not pull neatly, I needed to cut slices into it to give more flexibility. I did one in the center of the corner, and 2 on each side for 4 sections total.
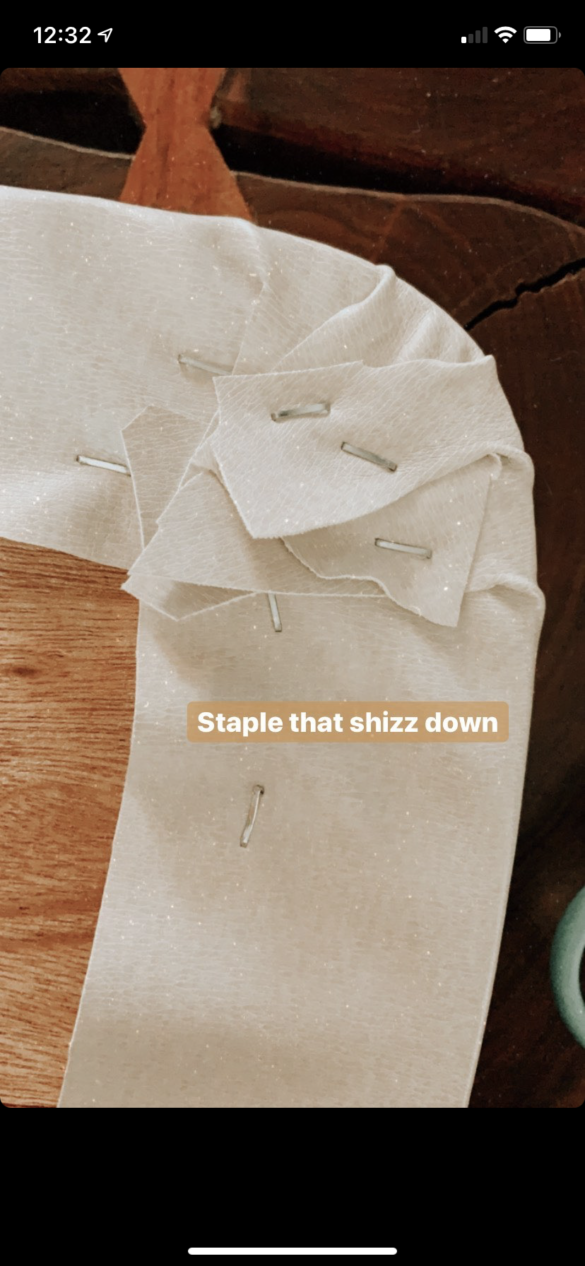
10 – Fold the sections into each other with opposing edges and the center last. Crossing the inside slit over last. Staple that mess down!
11 – Hammer. When you’re happy with how that looks, hammer down the staples to make sure they’re all flat and even.
12 – Place dust cover back on! Put it back with some more staples and admire your upgraded chairs!
A few steps, but overall not that bad and a good project you can pause throughout if needed! What do you think, will you be tackling upholstering anything in your life?


Comments are closed.