Earlier this year, I had some long awaited time off with my husband. I was so excited for us to have holidays together at the same time in almost a year, and had all sorts of things planned! However, he tested C positive which immediately stopped it all. I was certain I would be testing positive any day too (spoiler: I somehow never did), and got a little stir crazy being at home. So I did what any mentally stable person does, and decided to give the bathroom a refresh! Well, I decided to re-caulk the bathtub which… escalated. Give me a room to refresh and it’s like giving a mouse a cookie.
Caulk Problems
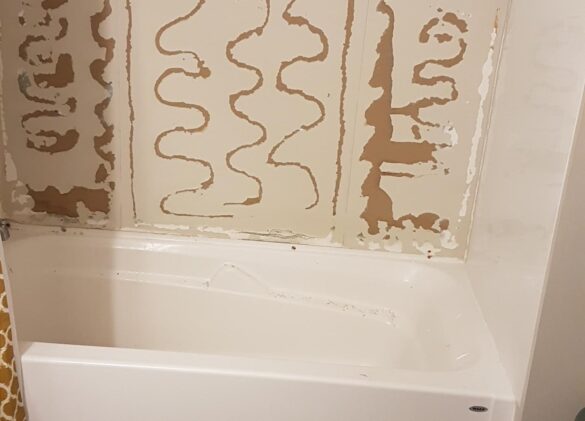
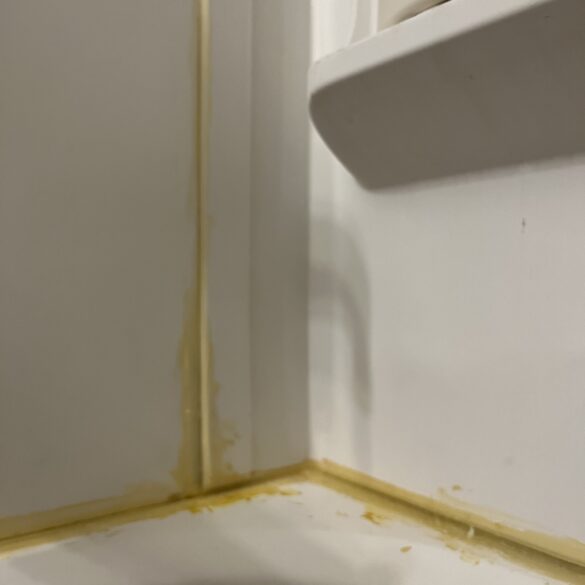
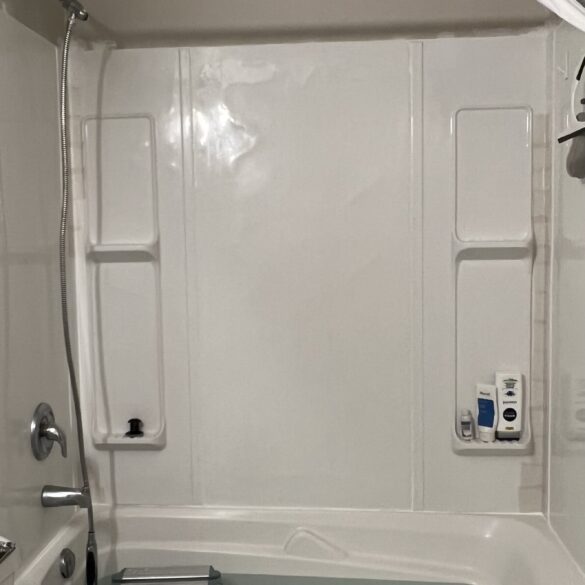
I feel to understand my sudden impulse to redo the shower, you need to know why it looked like this to start. Which is, it didn’t always look like this. In fact, it looked perfectly fine when we moved in. However, Joe noticed that it was lifting in some spots and was very concerned about mold (fair). Did I expect to receive a picture of the surround torn off the walls while I was 3 wineries deep on my bachelorette? No. Did Joe think he grabbed white caulk but it was clear and kept going? Yes. Did the clear “non-yellowing” caulk immediately yellow? Also yes. And so, you have what started this entire bathroom refresh that I put all my cancelled-plans-frustration into.
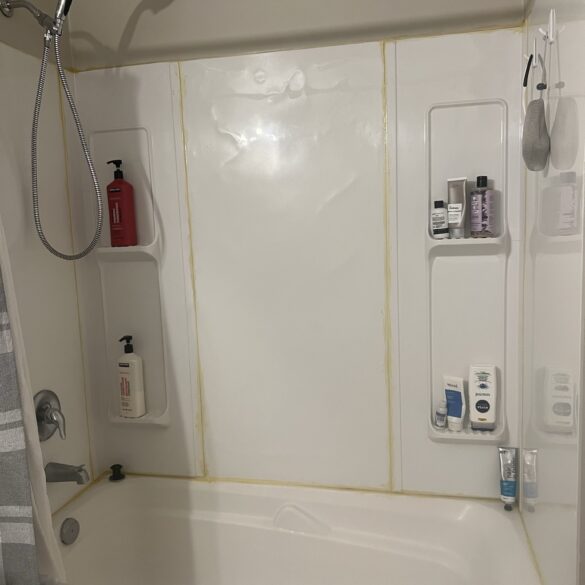
I took off all the old caulk with a caulk removing spray and a tool meant for it. This still required a ton of elbow grease. BUT I did it all on my own! After, I cleaned it really well with vinegar, let it dry out, and taped off the areas that would be re-caulked. A million years ago, I read that you need to fill the tub with water so that it sits at the lowest point when caulking, so I did that, dangerously put a stool in the water, and hoped I wouldn’t sprain my neck. I also ensured I got white silicone this time because while I forgive, I don’t forget. It looked so much better!!
It was also though at this point I realized that in removing the caulk and body slamming myself into the surround to remove it, caused a few cracks along the corners. And by few, I mean it is shattered. After having a public breakdown in my Instagram stories, I went to the store and picked up the As-Seen-On-TV Flex Tape that is supposed to fix all. I applied it in a shingle like fashion and now my tub is literally held together with tape and prayers until we can fix it. Still looks better though, right?
Give a mouse a cookie
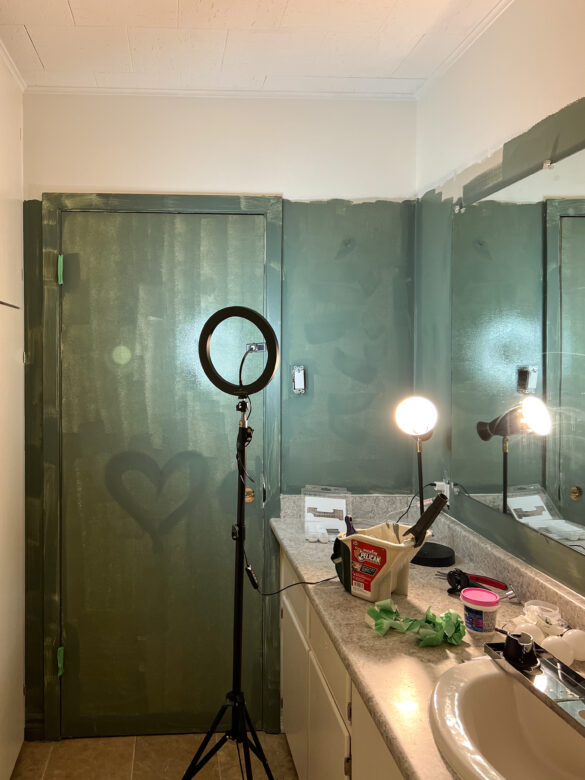
Now that the tub was looking so much better, after 3 long days, I thought “why stop now.” Actually I thought “oh crap, I accidentally ripped some of the paint off and have to touch it up” which lead into “well, we might as well repaint the whole bathroom.” The fun thing with living in an older home though, is that smoking is now frowned upon but wasn’t always. Which is my way of saying “every time we shower, the humidity causes nicotine to drip down the walls.”
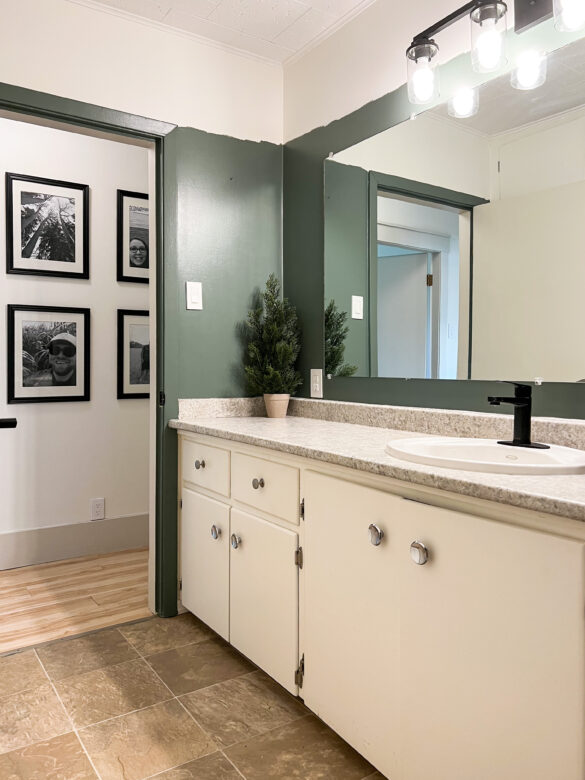
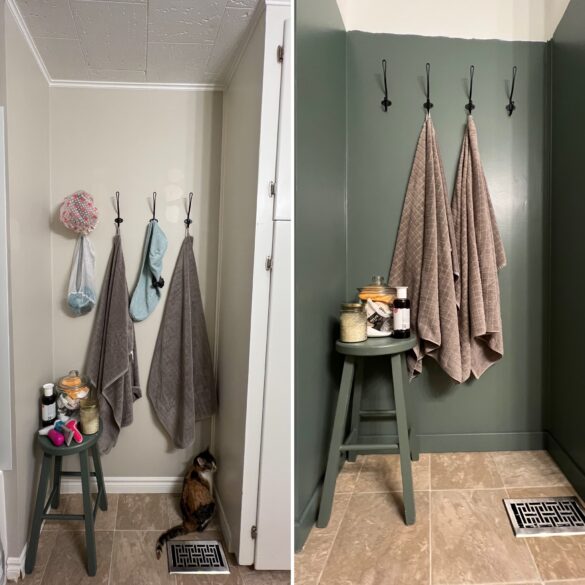
Before painting, I had to prep a few things. I got this primer meant for smoke stains, and re-primed the ceiling and trim. (It’s been 5 months now, and I am happy to say there haven’t been any more drips of nicotine!) While that dried, I also fixed some spots that weren’t filled correctly when we removed old shelving, then sanded the spots smooth. Once that was all done, I painted the top BM Simply White, and the bottom 3/4 in Behr’s Heritage Park. This unfinished edge is to look like ripped paper, and is heavily influenced by Liz’s guest room! I have loved it since I saw it years ago and knew I wanted to re-create it somewhere.
Why stop there
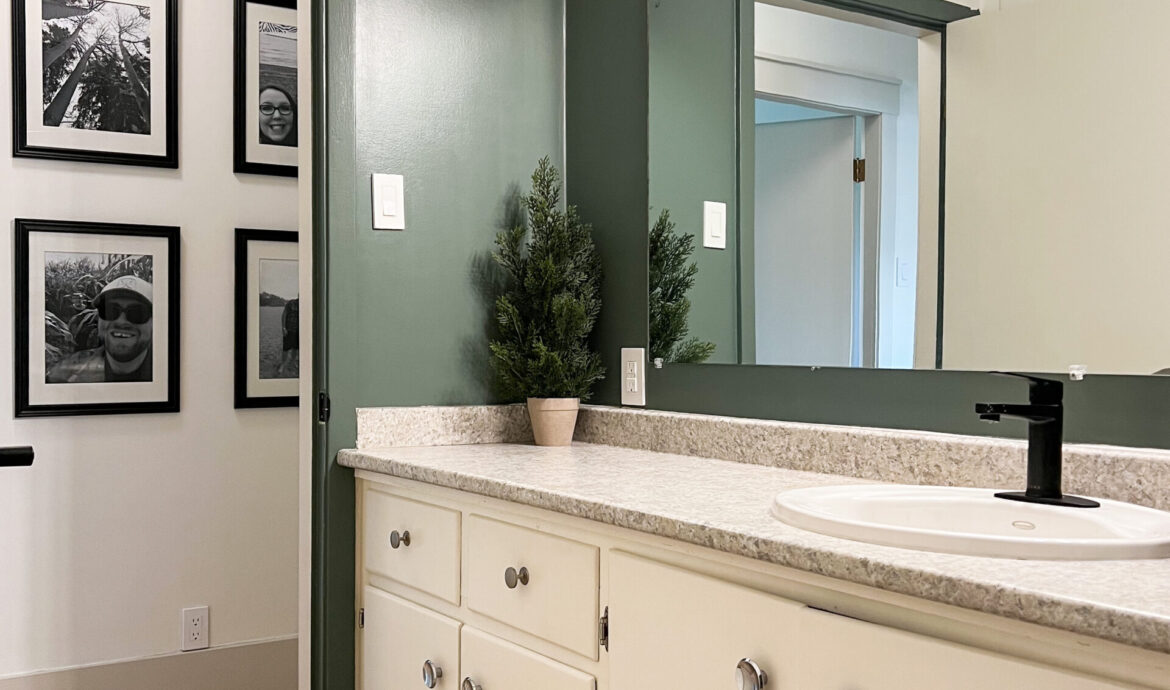
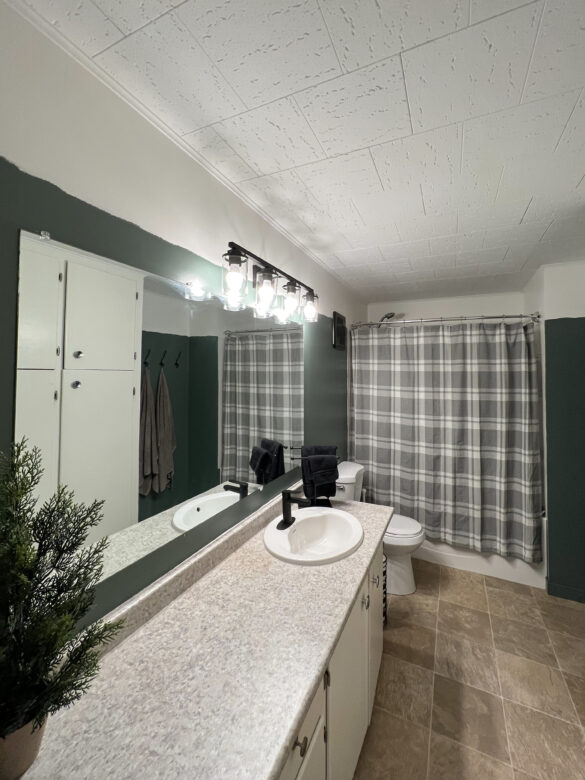
This freshly painted room needed a few more updates for it to be a full bathroom refresh. Since I was painting anyways, why should I paint around an old light fixture? And the fan cover just didn’t seem to go on the wall anymore. So with a new light, and some spray paint, I did a couple of final touches. Suddenly, the bathroom felt more modern and clean. Without nicotine running down the walls, it looks like it was always meant to be. Just don’t look at the tape too closely.
To see other paint colours in our home, click here!


Comments are closed.