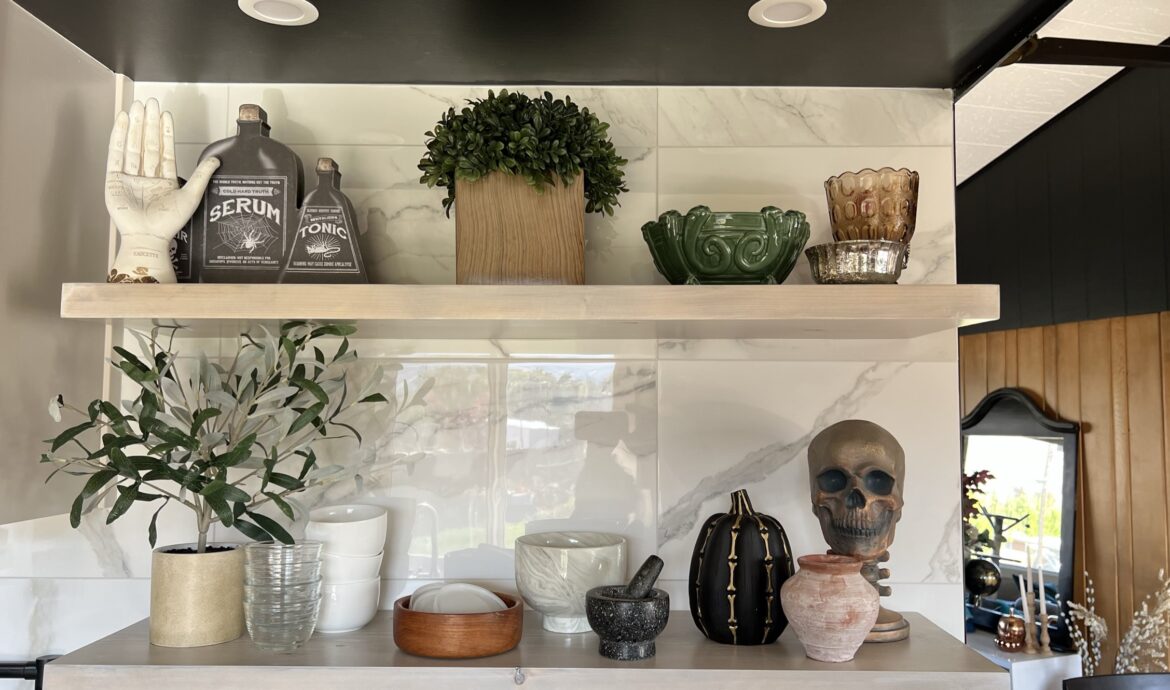
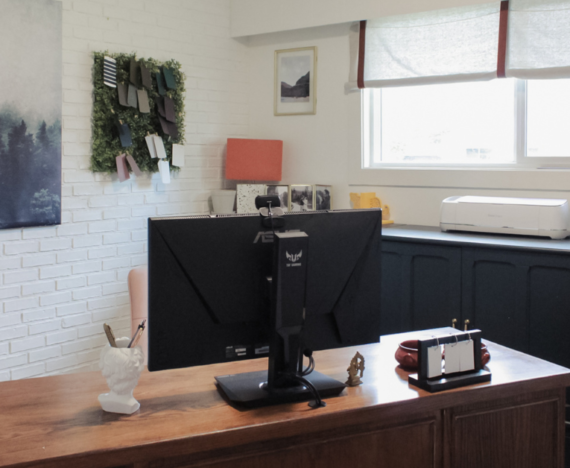
I’ve wanted floating shelves for as long as I visualized this kitchen renovation, and knew I wanted it on both sides of the hood vent. However, in looking at different styles and types of floating shelves online, I knew I needed something stronger. While I didn’t know what exactly I might put on the shelves, I didn’t want to consider the weight ever. We also needed to come up with something that was fairly fast to put together and would be able to be tiled around easily. Enter: plumbing pipes into studs for shelves.
The thought process:
We previously used plumbing pipe for some industrial styled shelves in our condo. While those were a very different style, they were incredibly strong and we knew we could look at an adapted version for this project. For the brackets of the shelves, we used 1/2 inch pipes and floor flanges to attach it to the studs. We landed on 1/2inch by holding it up to the wood I had chosen for the shelves themselves, and ensured it would not be wider than the depth of the wood. If you have deeper wood, you can choose a 3/4 inch or even 1 inch pipe if you choose. We then would drill long holes into the wood to slide over the pipe and voila, shelves!
HOT TIP: Something to be mindful of though is that the size you choose of pipe, that is the inside diameter. This comes into play when choosing a drill bit for your wood. If you choose a 1/2 inch pipe, a 1/2 inch drill bit will be too small. We used a 7/8 drill bit.
The details on how to build floating shelves:
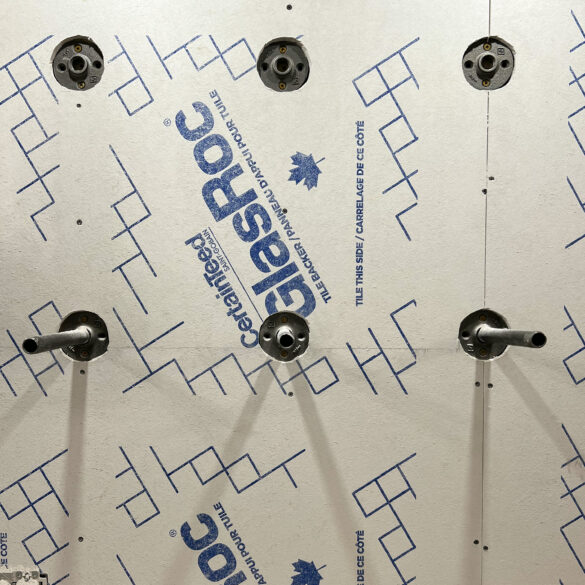
1- To have the flanges flush with the drywall, Joe used a hole saw (this is the kit we have) to drill into the drywall onto the studs in the size of the flanges. This allowed the flanges to be recessed and attached direct to the studs. We used GRK screws for maximum strength.
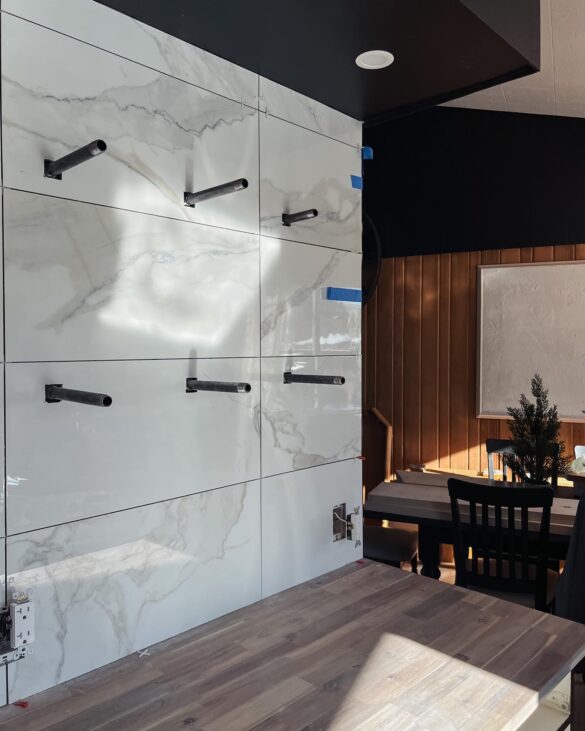
2- After attaching the pipes to the flanges, we laid the wood for the shelves ontop. this allowed us to mark where the pipes would be on the shelves.
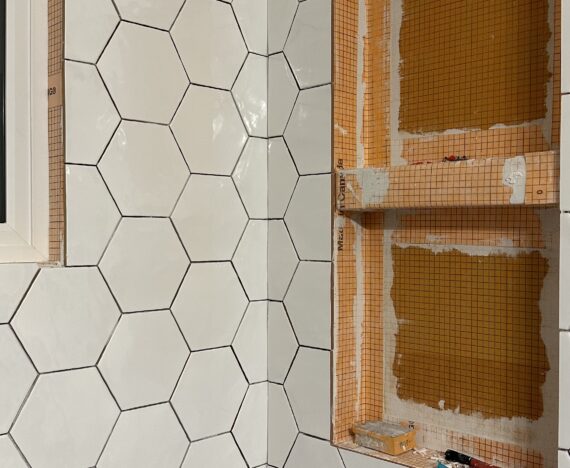
3- During this time our wall was tiled.
4- Using the Milescraft DrillMate, we were able to drill straight into the shelves. We were most nervous about this step as we have notoriously not been the most… consistent… with drilling holes straight. We also needed to drill 8inches. I cannot recommend the DrillMate enough for this. You can use a spade bit, auger bit, or forstner bit for this. I believe we used a spade bit, taking it out every so often to vacuum up some of the dust so that it didn’t burn.
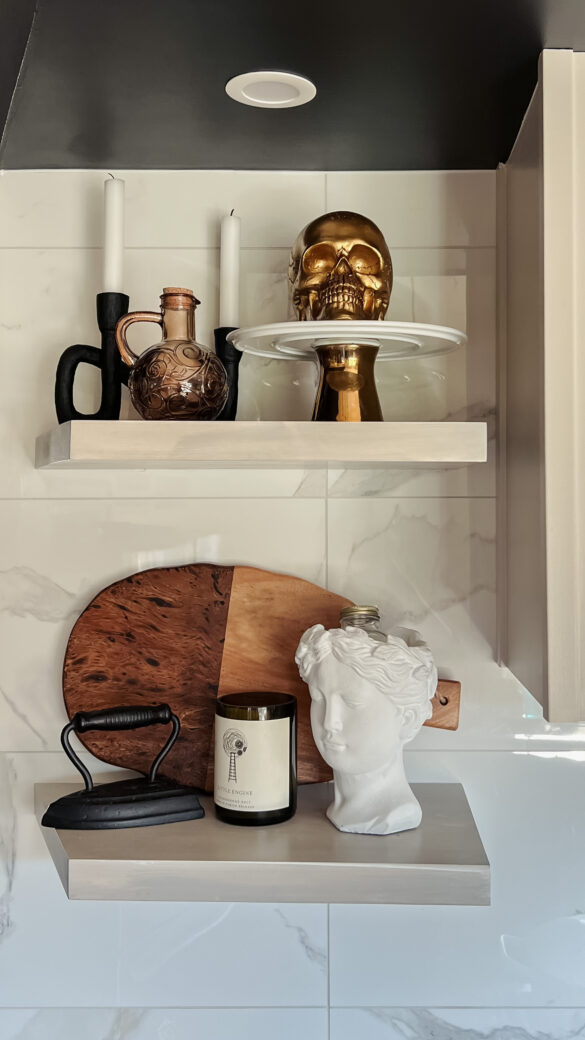
5- Stain/paint/finish your wood shelves.
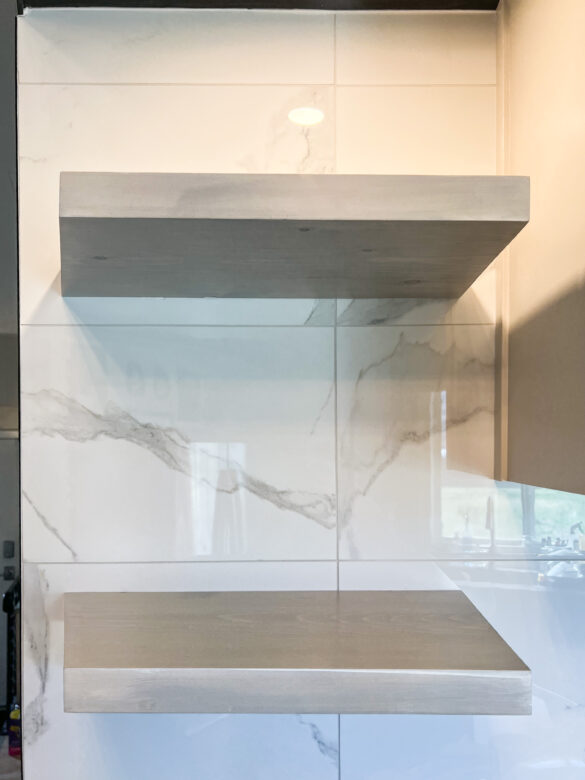
6- Attach to the pipes! We did not glue ours on as it was very snug to get on, and even used a rubber mallet to help us get it close to the wall. We did caulk around it as well. Given we don’t have children pulling on them, we felt safe with them as is. You can look at different adhesives as well of course.
7- Style you shelves and enjoy!
Final thoughts:
While I do not have a final amount of weight these can hold, the tiler asked if we were going to hang babies by them. Not entirely sue what that means, but they have been very stable for us and not bent under the weight of my dutch oven or anything else I’ve put on them! I also love that I can change it out to a different wood later on if I choose. I would highly recommend if you are able to!

Sarah
Alyssa! This is great! Thank you for sharing the details!