Taking a break from the kitchen real quick to work on our garden! I love being out in the garden, but every hour I am is an hour away from this kitchen reno right now so we knew we HAD to do something to make it better. Enter: easy diy garden irrigation! Best part, is you can do most of it for under $100!! (Timer will run you more than that, but is optional).
I have spent way too many hours researching this, and planning layouts for how to get water from our house to the garden, which is a substantial distance. And then after spending HOURS in Home Depot laying out all the parts we needed, and realizing that they were going to cost much more than we wanted, we switched gears to PVC.
Now something to note is that you do not want your PVC to be exposed all the time. We currently have it above ground, but will be digging it down later. I would suggest digging about 6 inches down, but we are going to do 2 inches as then we are going to do 2 inches of gravel later on.
Layout
The first step is to plan out your layout. For us, it looked a little something like this:
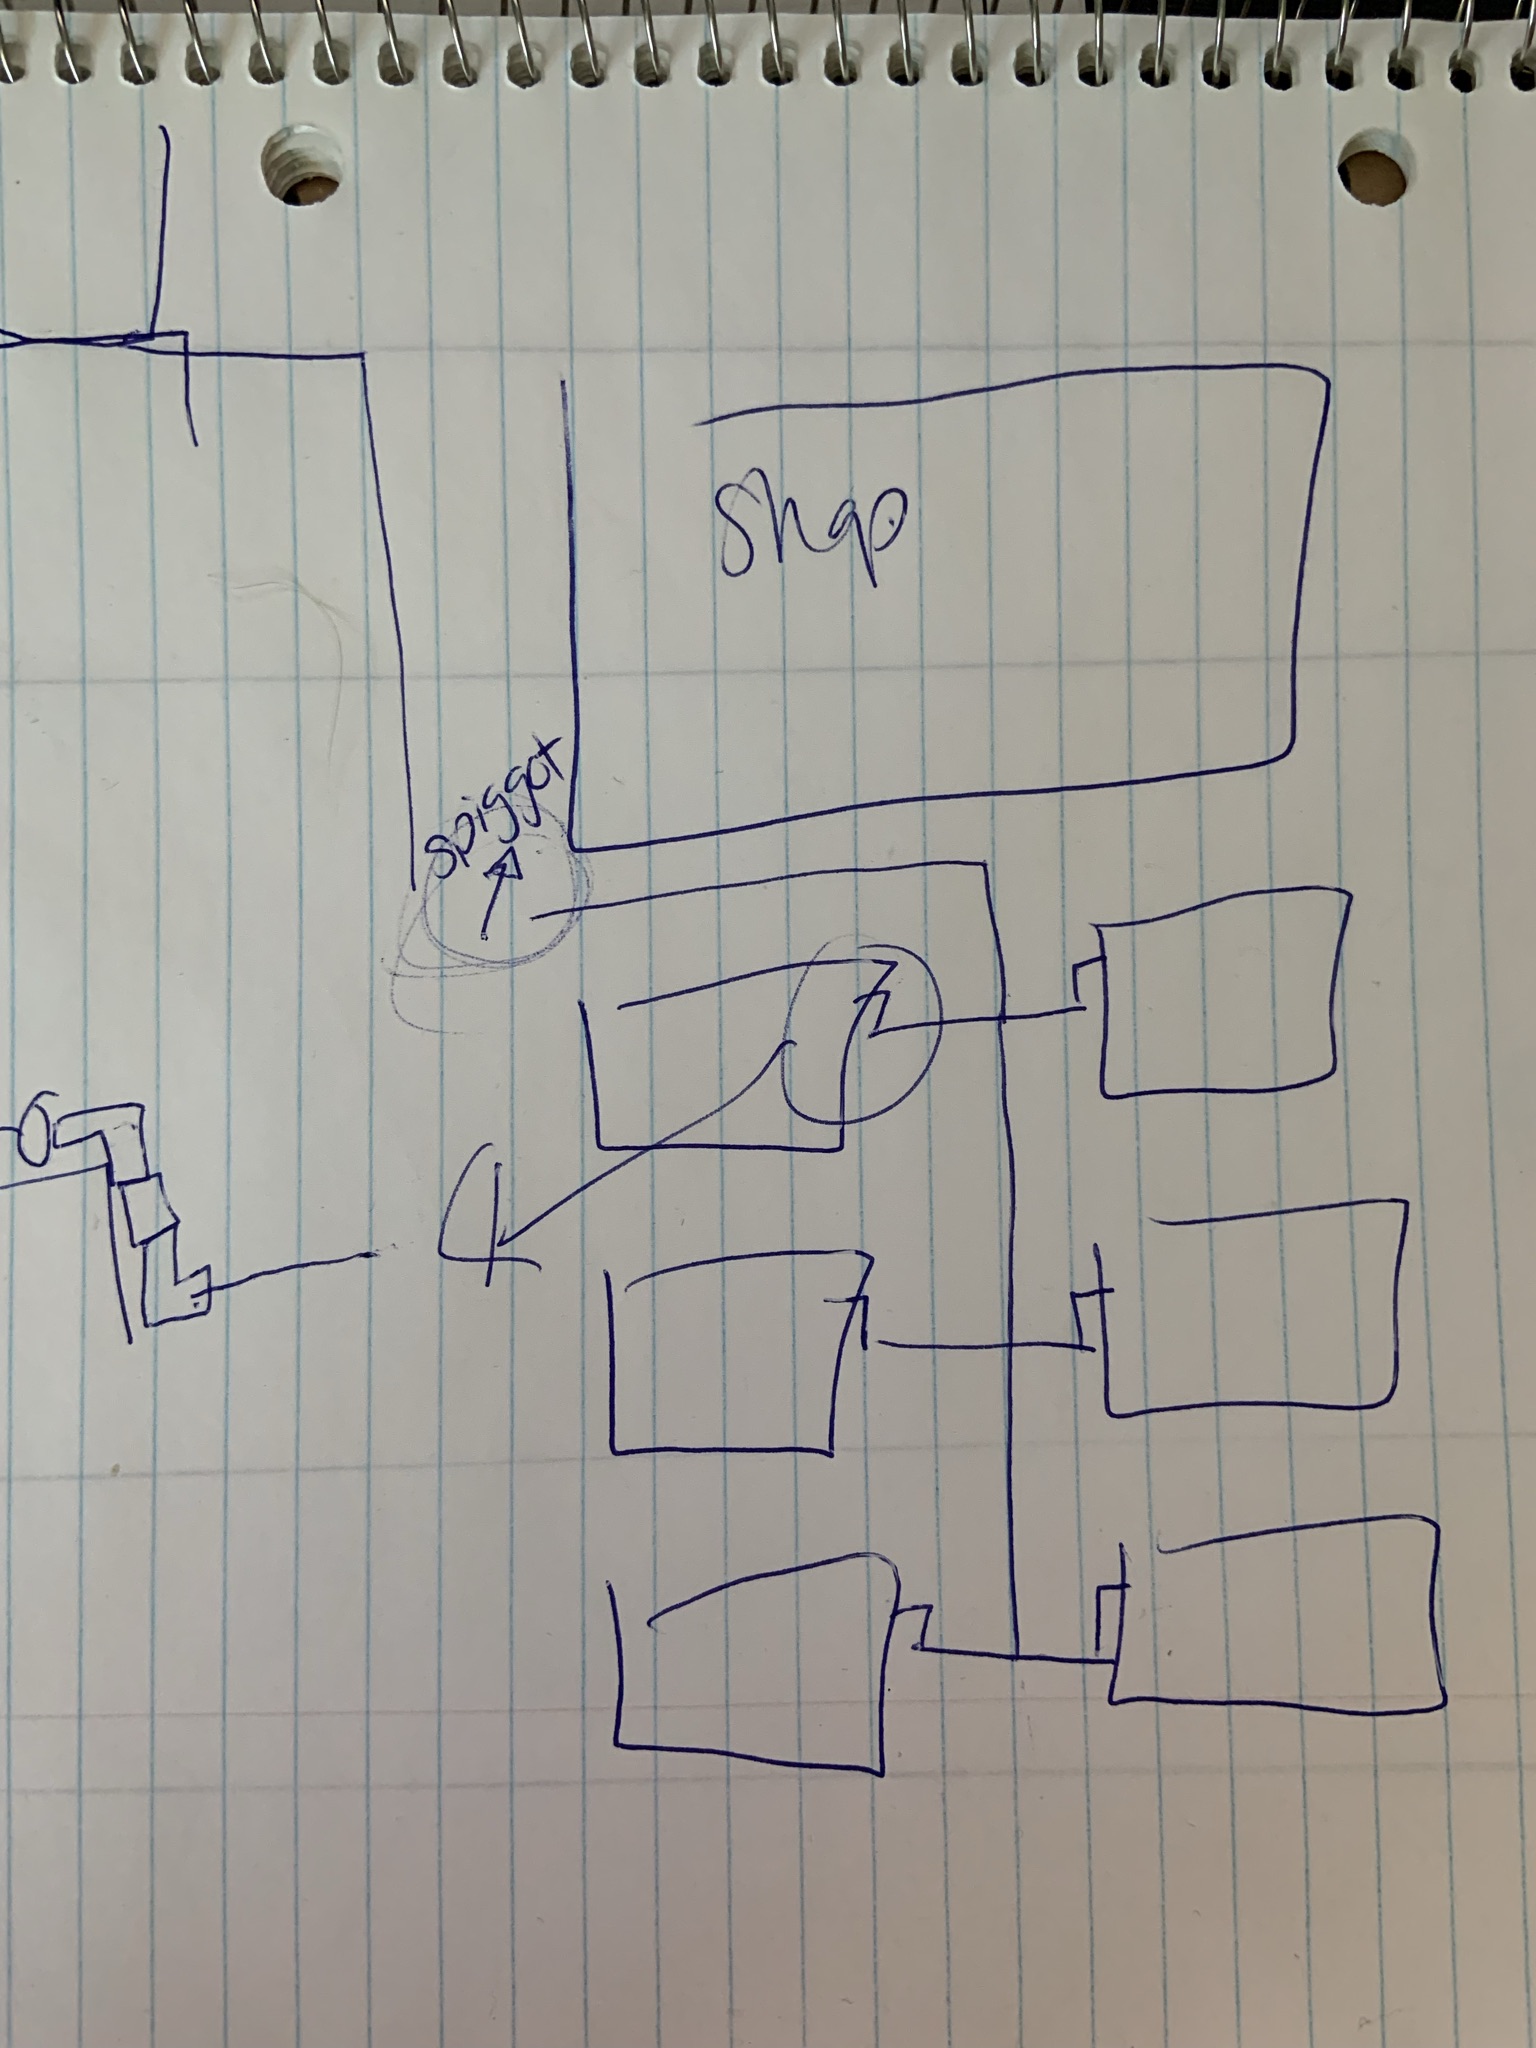
Very professional rendering, I know. Paid top notch for it.
We will have a main line connecting all of the offshoots, and then soaker hoses to connect to each of those spots. These will not have multiple zones as a) that’s more money (you need different parts/fancy timer) and b) i just water it all at the same time anyways. You also want to think about if you want a part to drain automatically, or will you blow it out yourself? We are going to blow it out ourselves with a hose at the end of the season and cap the top as our area if fairly flat so there’s no “low” spots to naturally put a drain.
Off to the store/what to buy
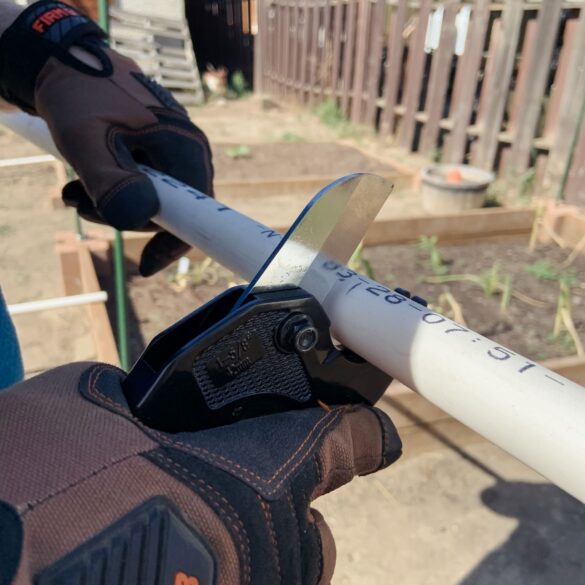
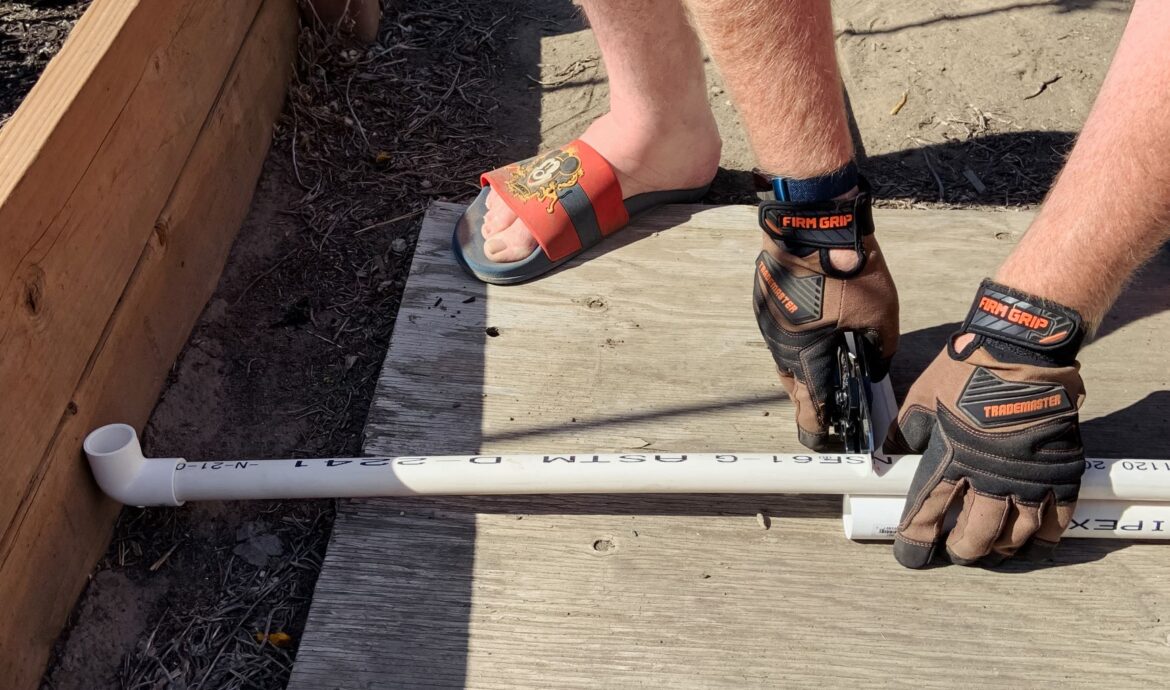
Number one tip here: buy more PVC than you think you will need!! Also, if you think it won’t fit in your vehicle, buy yourself a set of handy PVC cutters like these for $12 and put them to use in the parking lot. We cut ours down to 5-ish foot lengths and that worked great for what we were doing. We ended up buying about 2 lengths more than planned and used all of it. (7 lengths in total).
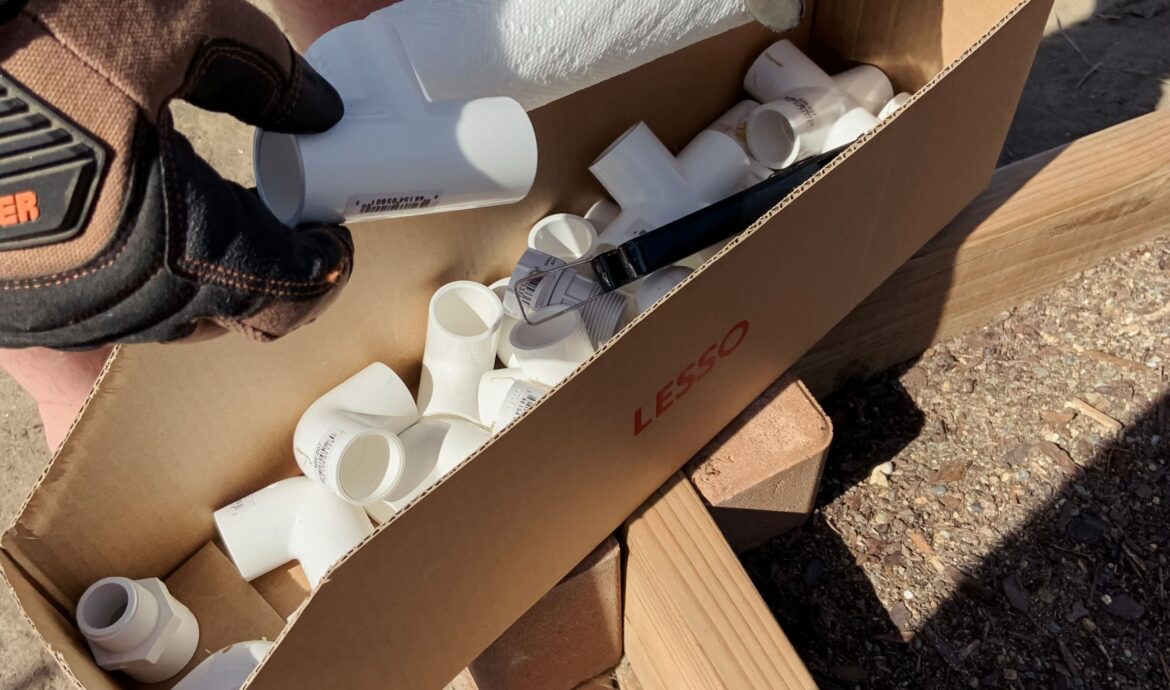
What we bought was:
- 7 10ft lengths of 3/4 inch PVC ($3.74 each)
- 16 elbows (2 needed per garden box and the rest were just to get the hook up to where I wanted) ($1.10 each)
- 1 Tee (used at the end instead of a cap) ($0.80)
- 2 Crosses ($1.91 each)
- 6 Male adapters (to hook up the soaker hoses for each box) ($0.93 each)
- 1 female adapter (used with the female swivel) ($1.12)
- 1 female swivel (to hook up main hose to the entire line) ($3.44 each)
- 4 coupler ($0.60 each)
- 1 PVC cutter ($11.95)
- 1 PVC glue/primer set ($14.51)
- total cost: $83.96
I didn’t include hoses in that as every gardener will want a different hose. We used hoses we had already or from the dollar store. Some gardeners prefer the flat green ones with holes. Some want the type that you poke your own holes in. This is a variable cost on what you prefer, and also size of your garden. Other items you might want (or we had on hand):
- paper towel for cleaning the glue. Having too much glue on your pipes will wear them down over time.
- landscaping staples or something to place your hoses where you want
- a wrench for opening that glue set because it has a horrible lid and all the reviews will agree with me, but it’s what we used
- gloves so you don’t get PVC cement all over yourself after your new manicure (oh hi).
- quick connect if you use Gardenia attachments
Setting it up – no real measuring required!
One of the things that intimidated me the most with starting this project is what I expected to be a lot of precise measuring. Boy, am I thankful I was wrong. Other than knowing the rough distance between boxes (and we set them all to be 4 feet apart), that was it!
First, we laid out all our pipes with the T and X where we figured they should go. Because we had cut the pipes in the parking lot, we also wanted to maximize the best lengths for the areas.

We started from furthest away from our hookup and worked our way closer. I also cannot stress the importance of dry fitting your pipes first. It takes more time, but is worth it if you change your mind on placement or lengths anywhere! We knew there would be a T at the end, so we attached one side of a horizontal pipe, cut it about half to the distance we figured, and put an elbow on that open end. This allowed for us to use it as a guide for the other half of the T. Then you just place, and cut! We found if you had the elbows on the end before you cut, it gave a more accurate “measurement” to know how much space it would need. Just keep on continuing until you’re where you want your main hookup to be!
Set ups for the hoses to connect
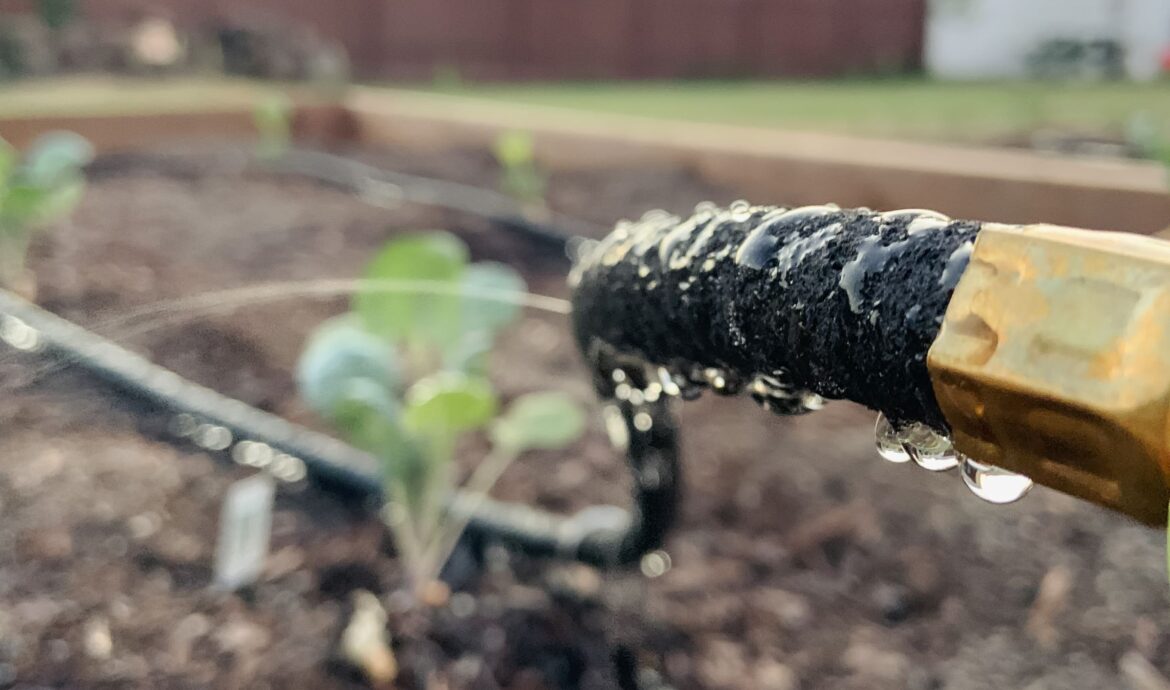
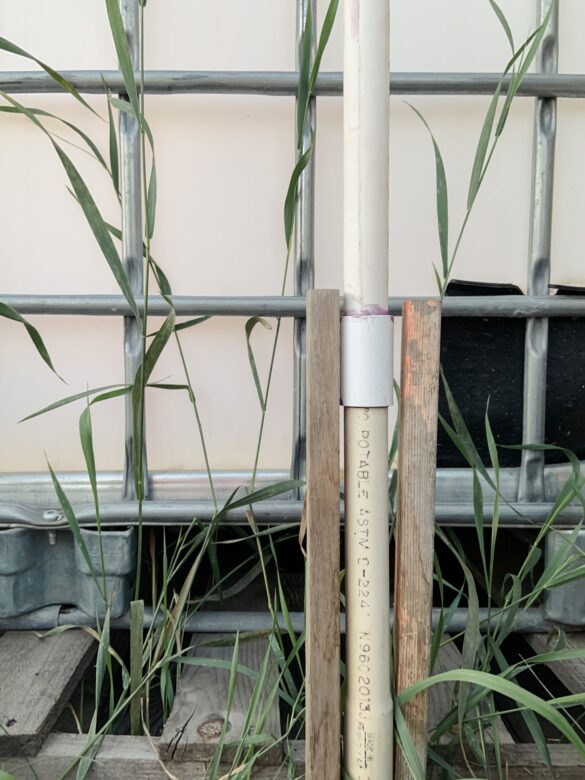
Once we had the main ground work done, we worked on the parts for the hoses to connect. Each box required this order: elbow – pipe – elbow- small bit of pipe – male adapter. We also found that when it came time for glueing, that doing this little section (minus first elbow on the ground) together to make a grouping worked the best for organization. The male adapter is the part that the soaker hose will hook onto. As you can see, we also made ours sit a couple inches above where the box is. That is because we will be burying our pipes eventually, as PVC is not created to be exposed to the elements to that degree.

As for the hookup to the main hose, you will want to use a female end! You can use just the female adapter, but adding the female swivel to it makes it so that your hose screws on easier. We also use a gardenia hose, and had an extra quick connect laying around so we added that to our set up.
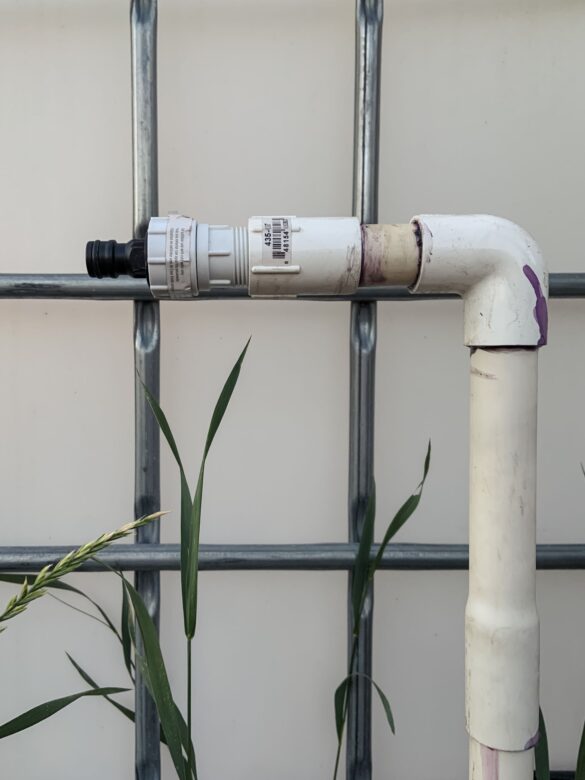
As this is above the ground quite a bit (for our set up), we wanted to brace it and used some extra survey stakes I had laying around. For some reason we have a lot of random landscaping stuff laying around these days…
Water your garden with ease!
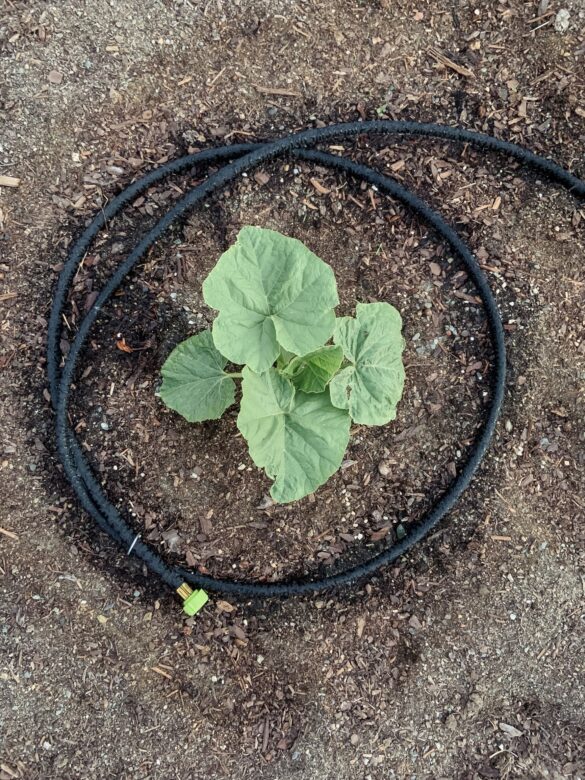
After you’ve dry fitted, glued it all together, do a test run to check for leaks! If you have some – fix them. If you don’t, celebrate! We did a test run and then hooked up our hoses. Each box has a bit of a different layout depending on what we’re growing. Some do a bit of zig zag, some a loop, and some a circle. My pumpkin baby for example, I did a circle as it’s the only thing in the box.
We’ve only had this set up for a week and already LOVE it. During this heat wave, it is great to just turn on the hose and walk away. We still need to set up our timer, but even as is, it has saves us so much time. Next on our to-do list is to mulch with straw overtop to encourage water retention.
Are you growing a garden this year? I’m already planning up next year’s!! And don’t forget to follow along with me this summer on Instagram at @thegoodelllife for up to date posts on the progress. Happy growing!!
For more projects I hope to complete this year, check out what’s on the docket for 2021!


Comments are closed.